
Struggling to reach people with your Instagram content? You’re not alone. Organic reach on the platform has been declining since 2016, when it said goodbye to the chronological feed. Today, Instagram’s algorithm prioritizes content based on engagement signals, leaving accounts without a lot of active followers in a lurch.
Boosting your posts can help address this issue by intentionally placing your content in front of more people (ideally, those who are interested). If you’ve got some budget to work with, it’s worth a try.
TL;DR
- You need a Professional Instagram account (Creator or Business) to boost. Switch in Settings if you haven’t already.
- Pick a post that’s already performing well organically, set your goal, audience, and budget, then hit “Boost post.” The whole thing takes about two minutes.
- Budgets start at $1/day, but $5 to $10/day for three to five days is the sweet spot for most creators and small businesses.
- Boosting gets your existing content in front of more people; Ads Manager campaigns (through Meta Business Suite) give you more control over creative, placement, and targeting.
How Instagram Boosted Posts Work

Boosted posts help creators and brands reach a wider audience with a piece of content they’ve already published on their Instagram profile. Think of it as putting a few dollars behind your best organic work so it actually gets seen.
At a glance, boosted posts look very much like normal Instagram posts. The only difference is they’ll be labeled “Ad” and may include a call to action (CTA).
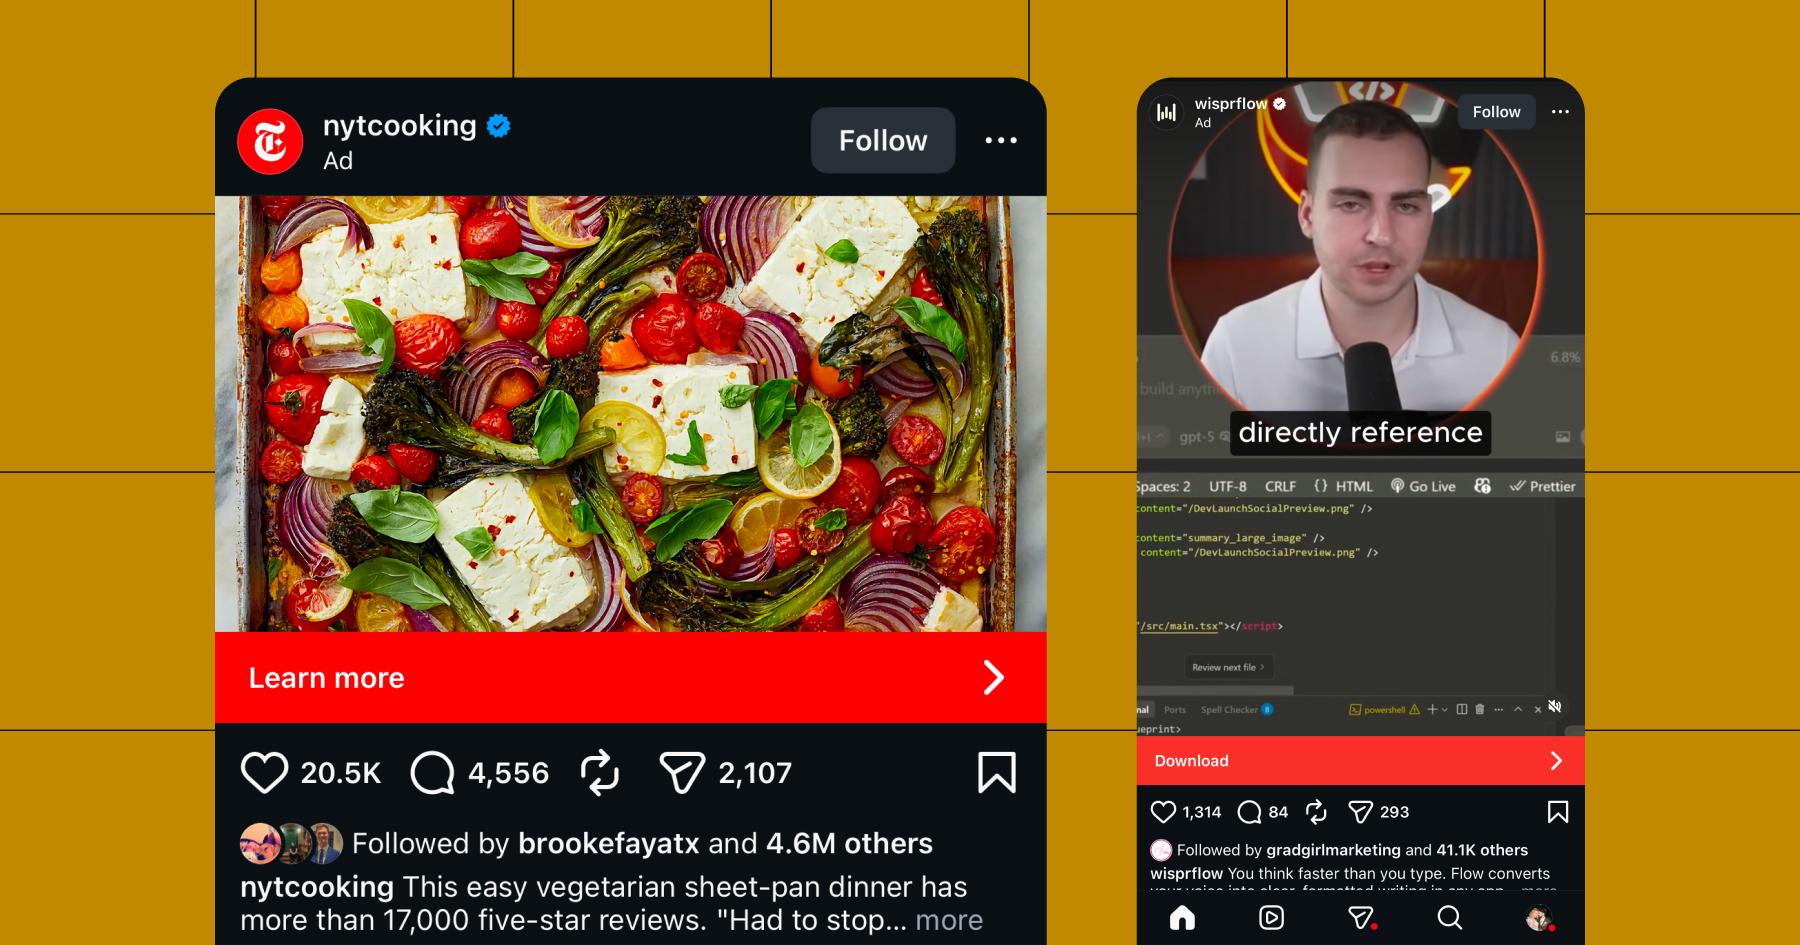
Boosted posts appear across the home feed, explore, and Stories. By default, they also run on Facebook unless you toggle that off. You can boost feed posts, reels, Stories, and even posts with product tags from your business’s Instagram account.
So why bother? A few reasons. Boosting builds brand awareness by getting your content in front of people who’ve never heard of you. It also helps you increase engagement on Instagram — more likes, comments, shares, and follows. You’ll also drive clicks (and hopefully, customers) to your site via the CTA button. Plus, you get access to richer post analytics than a standard organic post.
While you shouldn’t boost every post, there are times when you want your content to go a little further. In those moments, it’s worth investing a bit of money in a boost to guarantee the time and effort you put into creating the organic post pays off.
Boosted Post vs. Instagram Ad: Choose Your Fighter

Although they appear similar to Instagram users, boosted posts and sponsored Instagram ads are two different things.
A boosted post starts as something you’ve already published to your profile — you’re just paying to push it further. By contrast, a full Ads Manager campaign lets you create brand new assets (videos, ad copy, carousels) that appear as ads but never live on your main grid.
Instagram now lets you boost feed posts, reels, carousels, and Stories, but Ads Manager still gives you more format flexibility (collection ads, dynamic product ads, etc.).
Feature | Boosted post | Ads Manager campaign |
|---|---|---|
Setup time | About two minutes from the app | Longer, multiple steps in Ads Manager |
Content types | Feed posts, reels, carousels, Stories | All of the above plus collection ads, dynamic product ads, and more |
Targeting | Basic (location, age, gender, interests) or automatic | Advanced (custom audiences, lookalikes, detailed behaviors) |
Placements | Home feed, explore, Stories, Reels tab | Manual or Advantage+ placement across Facebook, Instagram, and Messenger |
Analytics | Reach, engagement, clicks, cost per result | Detailed performance metrics, conversion tracking, A/B testing |
Best for | Quick reach on proven organic content | Custom campaigns with specific conversion goals |
To summarize:
- Boosting is the better option if you’re trying to increase reach and engagement on a single Instagram post.
- Ads Manager is the move when you need custom creative, deeper targeting, or tracking that follows people from first click to purchase.
Choosing the Best Post for a Boost

Before you hit that “Boost post” button, pause. Not every post deserves a slice of your ad budget. The whole point of boosting is to amplify content that’s already working, so let your organic performance do the scouting for you.
- Look for above-average engagement. If a post got noticeably more likes, comments, saves, or shares than your usual content, that’s your signal. The algorithm already liked it; now pay to show it to more people.
- Match the post to a goal. Boosting a pretty sunset photo makes little sense for achieving a specific outcome. If you want website clicks, pick a post with a clear CTA or product mention.
- Skip posts with weak visuals or vague captions. More eyeballs on mediocre content just means more people scrolling past it. Boosting won’t fix a bad post.
- Consider timing. Posts tied to a launch, sale, or seasonal moment are great boost candidates because they have a built-in reason for people to act now.
- Check the format. Reels, carousels, and feed posts all qualify. Just make sure the content doesn’t include copyrighted music or violate Meta’s ad policies (more on that below).
How to Boost an Instagram Post in 7 Steps

Ready to boost one of your Instagram posts? Follow these steps to share your content with a wider audience right from the Instagram app.
1. Tap “Boost post” under your chosen post
Head over to your Instagram profile and tap the post you’d like to promote. Below the post’s image, hit the “Boost” button:
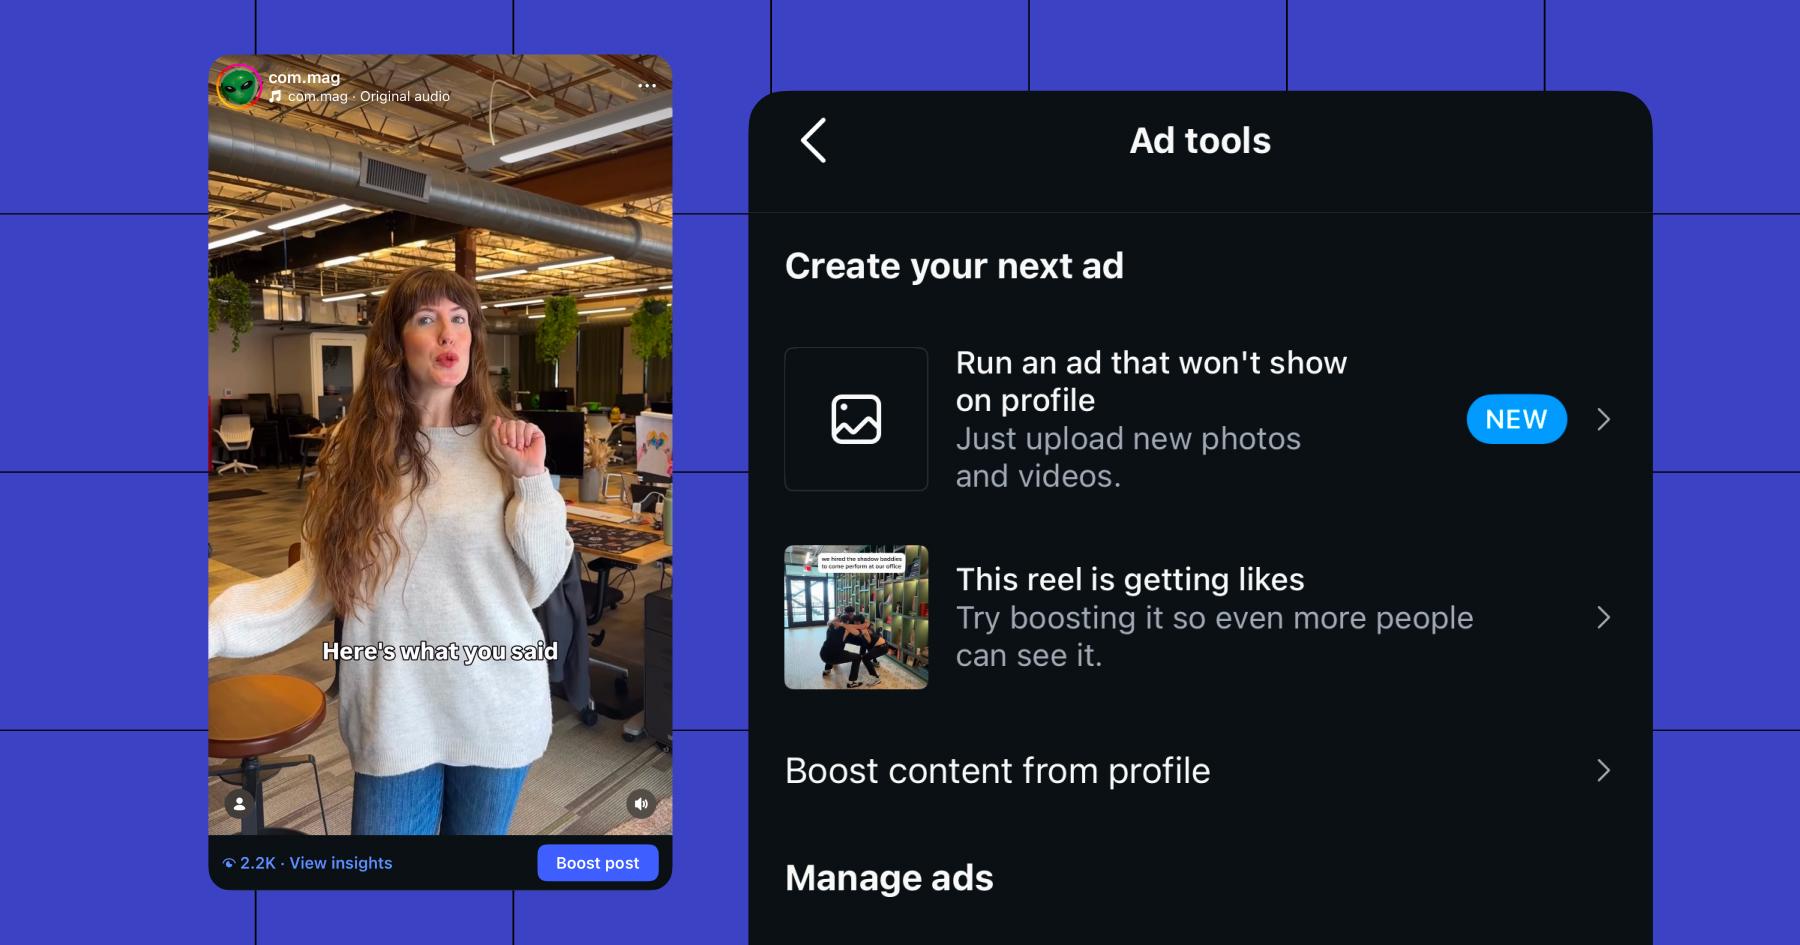
You can also boost from the Ad Tools section in your Professional dashboard: tap Ad Tools, then “Choose a post” to browse your recent content. Either path gets you to the same place.
2. Pick your goal
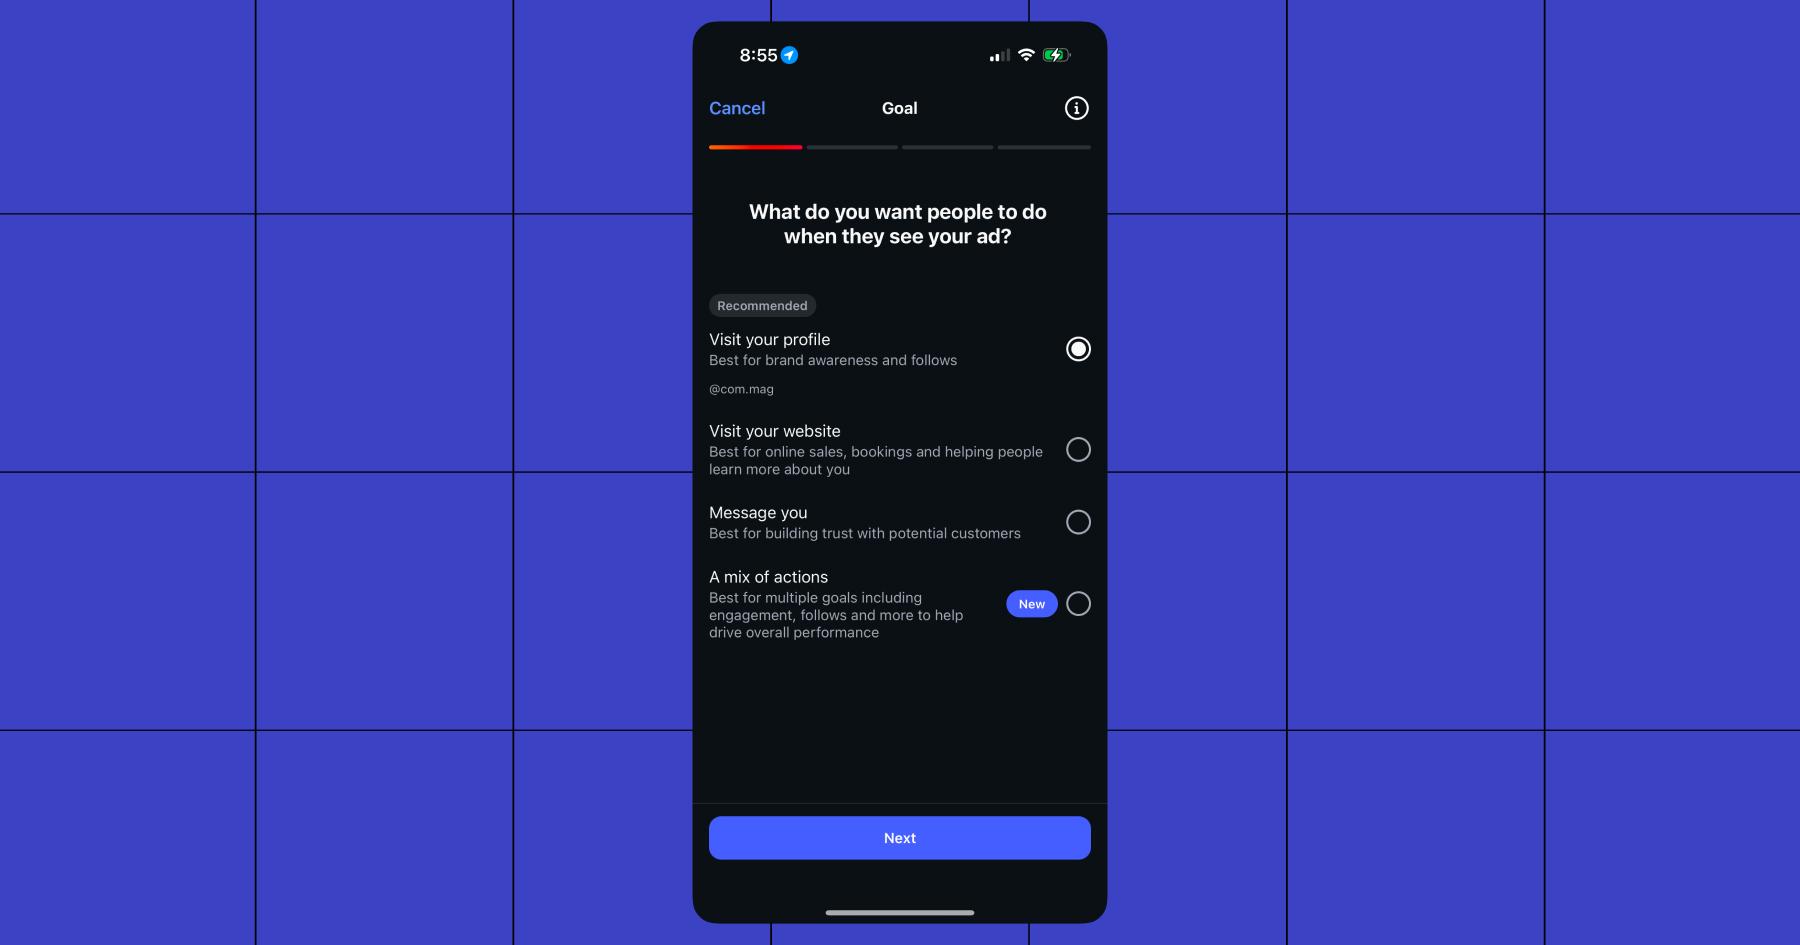
The next step is to choose a goal for your campaign. You’ll have a few options, and the best choice depends on what you actually want from this boost:
- Visit your profile: Best for building brand awareness and growing your follower count.
- Visit your website: Best for driving targeted traffic you want to convert into sales and leads.
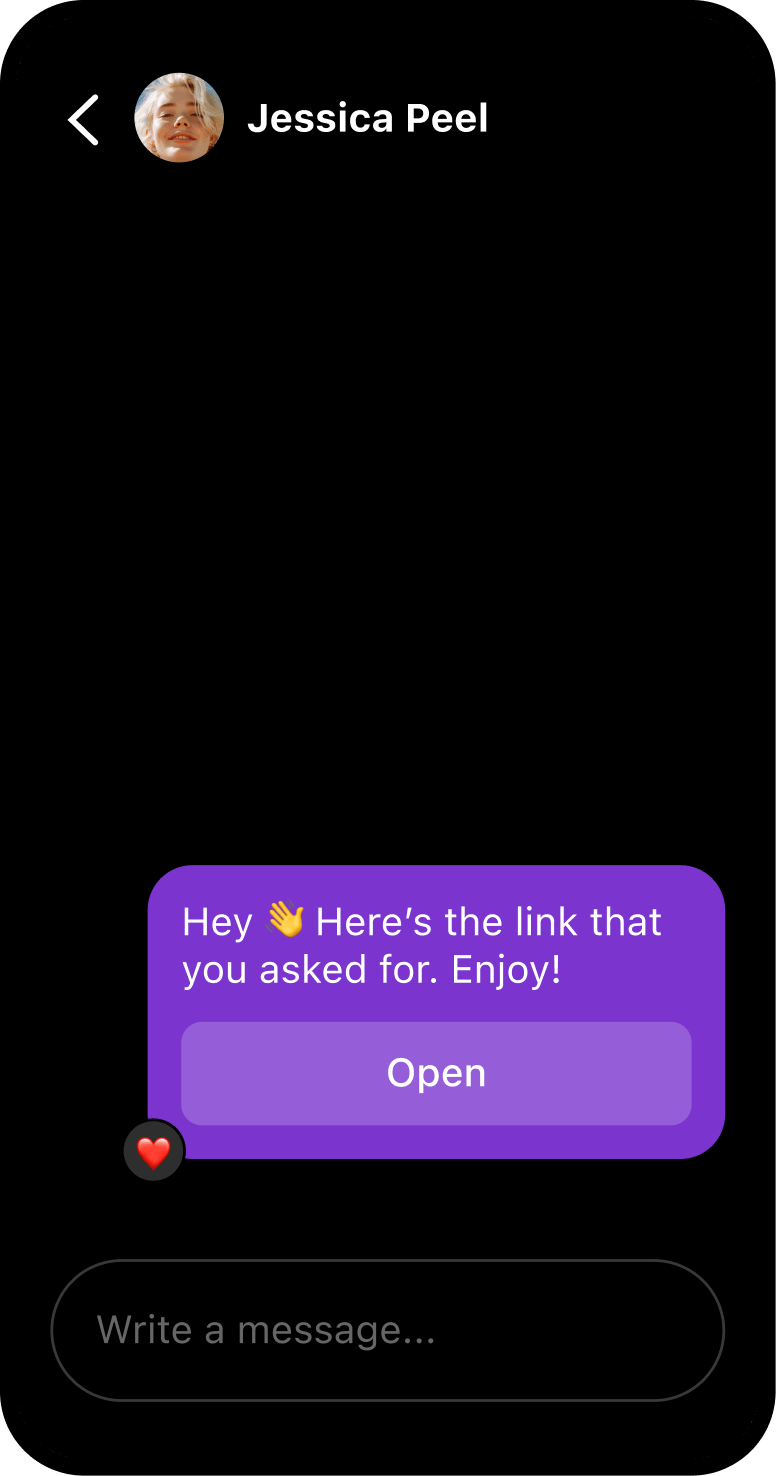
- Message you: Best for building relationships with new and existing followers by encouraging them to interact via DM. (This one pairs perfectly with DM automation; more on that later!)
As of 2026, there’s also a new option that allows you to choose a mix of actions.
3. Choose your audience
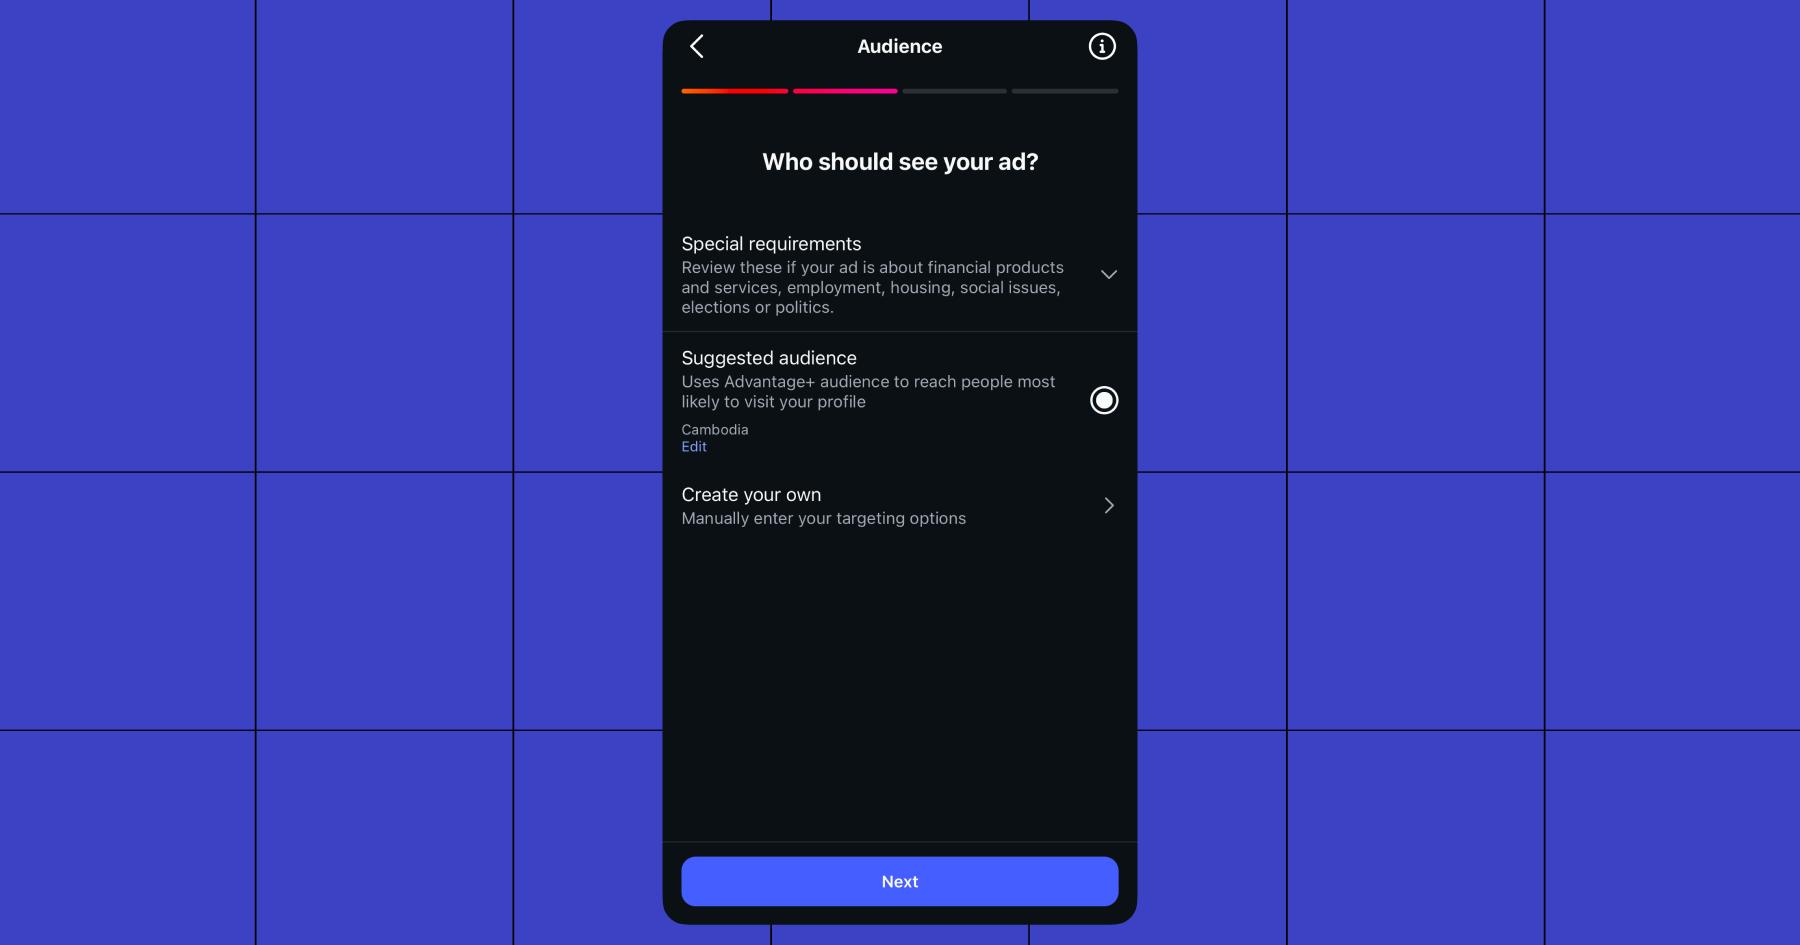
Next, choose the type of Instagram user you want your boosted post to appear in front of. Instagram’s advertising algorithm needs to know whether you fit its criteria for a special ad category (housing, employment, financial products, or political ads), which come with audience restrictions.
For everything else, you can choose between automatic or manual targeting. Automatic targeting (Advantage+) is essentially done for you by Instagram’s algorithm. The platform will choose which users to target based on those who appear or behave similarly to your existing followers. If you want to go this route, choose Suggested audience.
If you want to target people based on your own insight and criteria, choose Create your own. Build an audience that reflects your target customer using criteria like location, age, gender, and interests.
Keep an eye on Instagram’s target audience size. While going broad might sound like the best choice, showing your ad to people who won’t actually like your content is a waste of money.
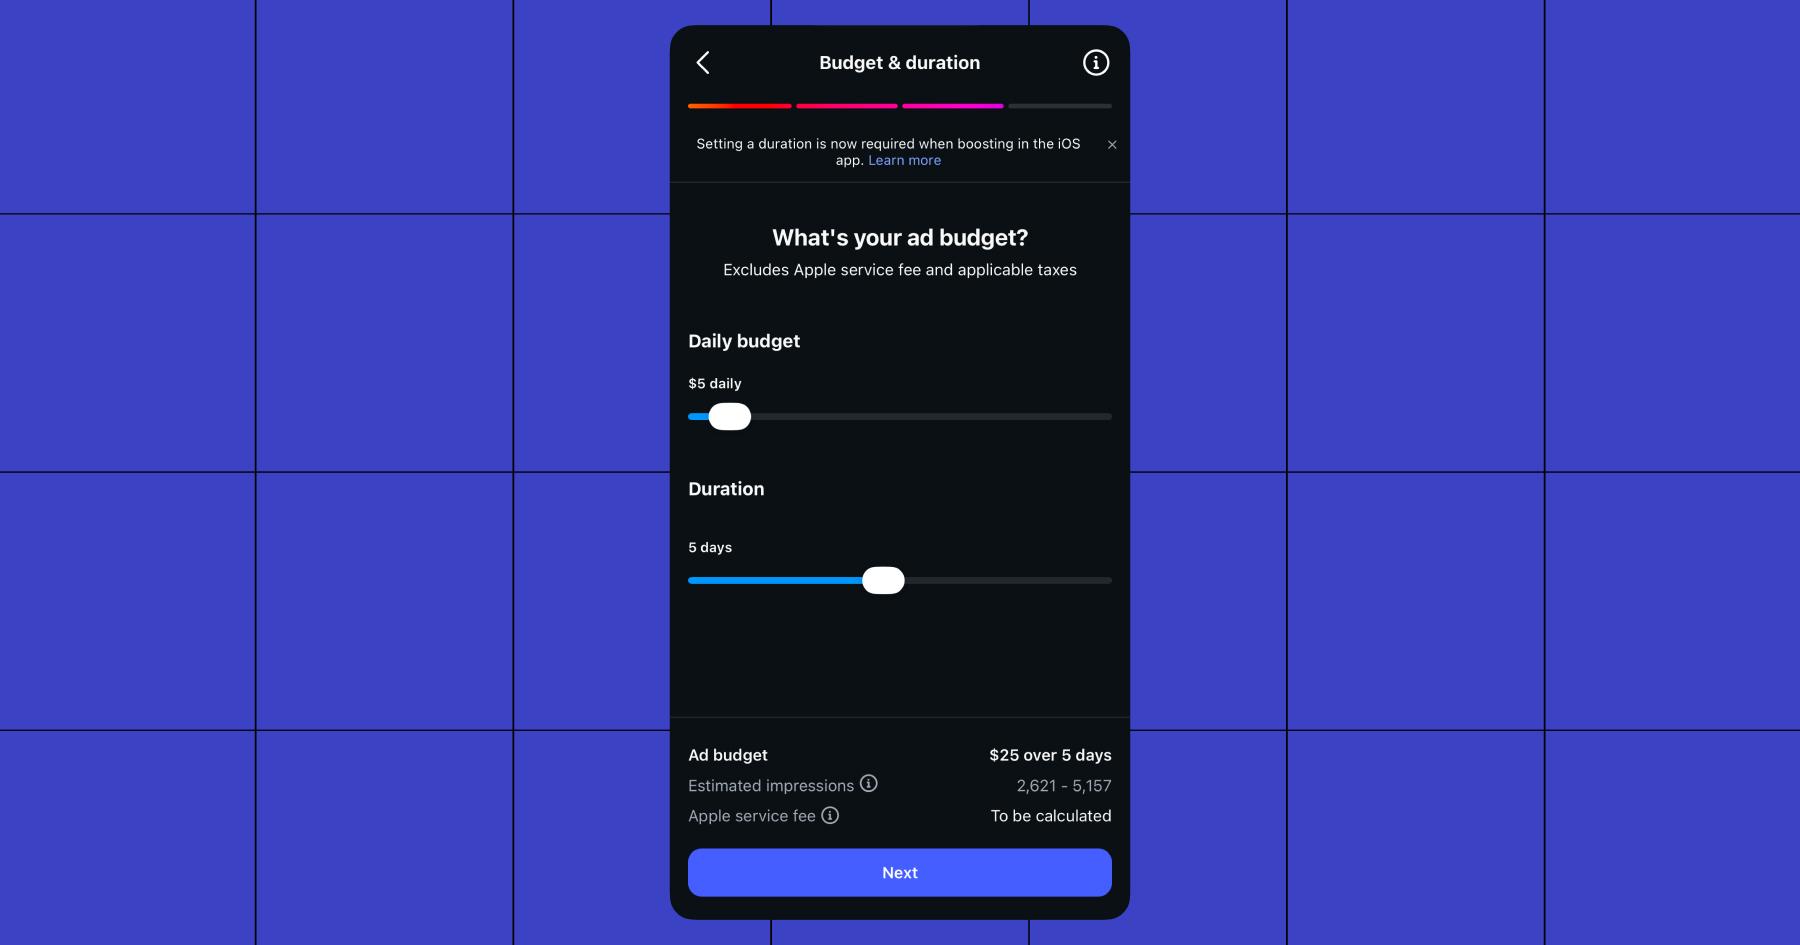
4. Set your daily budget and duration
Now you’ll choose your budget — the amount of money you want to spend per day — and how many days you want the campaign to run.
Instagram lets you start with as little as $1/day, but for most creators and small businesses, $5 to $10/day for three to five days is the sweet spot. That’s enough for the algorithm to optimize delivery without burning through cash on day one.
As you adjust the daily budget and campaign length with the sliders, you’ll see the estimated reach change. This gives you a good indicator of how many people your boosted post will reach once it’s live.
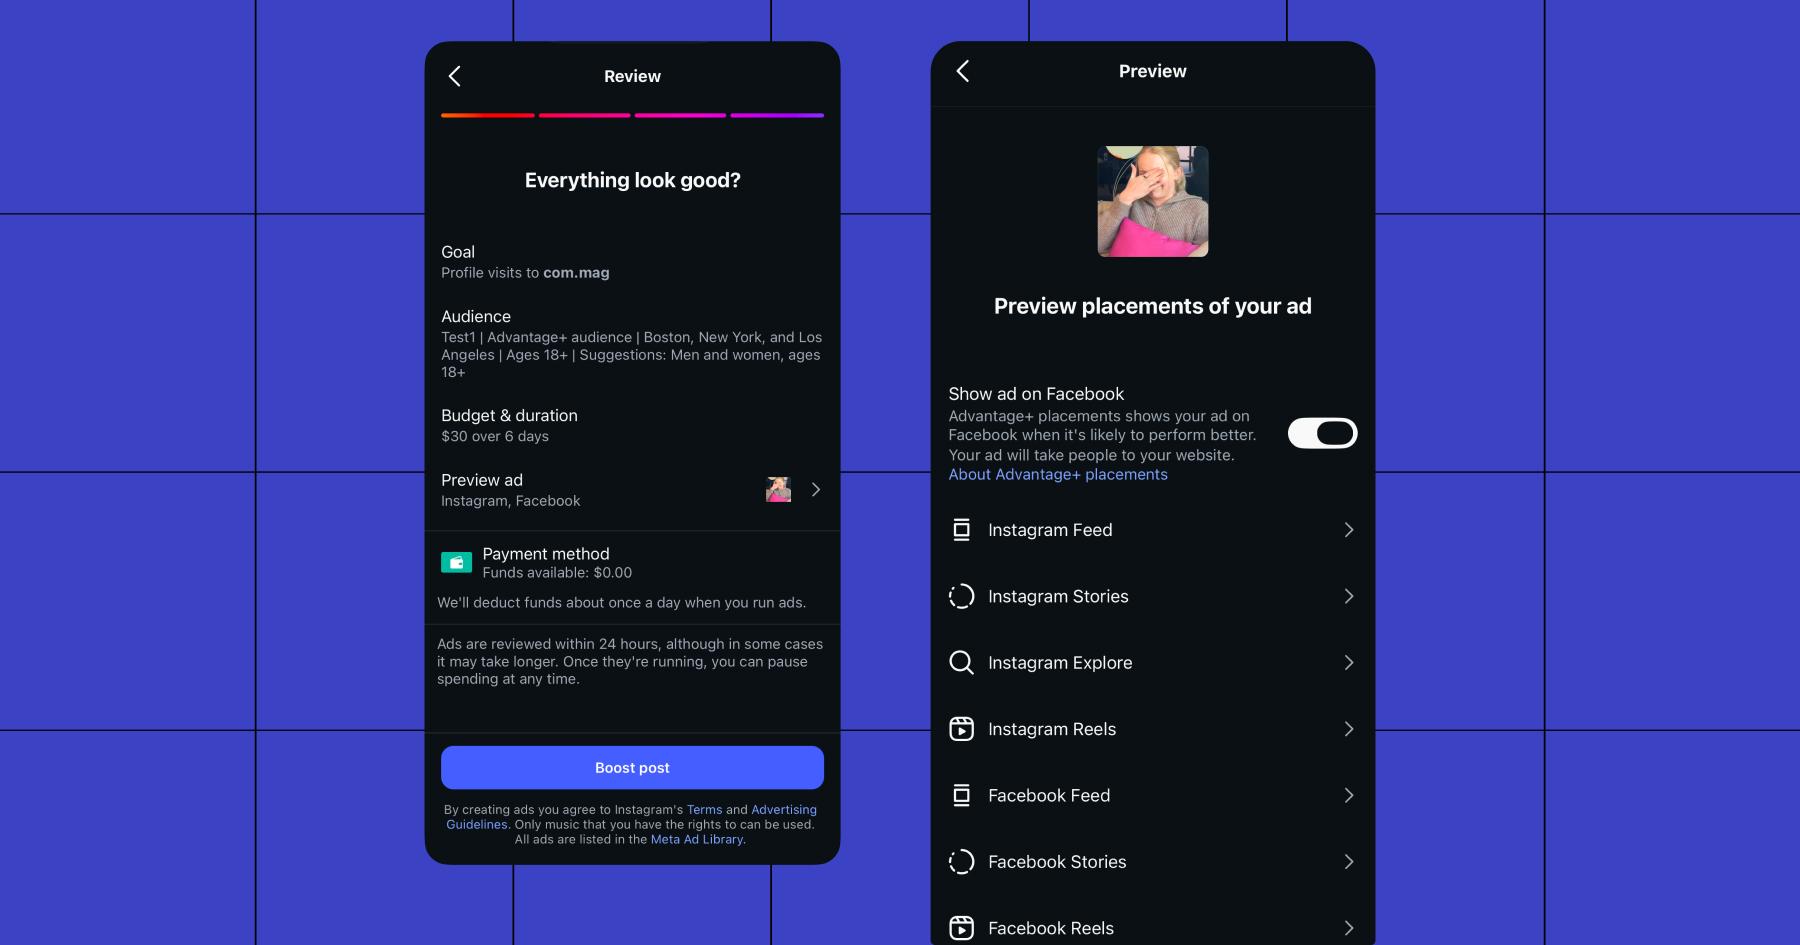
5. Preview and review everything
Once you’ve set your budget, review the criteria you’ve entered for your boosted post. Pay especially close attention to the targeting criteria and estimated reach. Remember, the goal of boosting any Instagram post is to increase the number of people who see your content and fit your buyer persona.
Tap “Preview ad” to see what the boosted post will look like when it appears in your target audience’s feed, Instagram Stories, or explore. This is your last chance to catch anything that looks or feels off before it goes live.
6. Add your payment method
To boost a post, you’ll need to enter your payment details. You can use an existing Facebook Ads account linked with your Instagram business profile, or enter your card details directly in the Instagram platform to fund your ad campaign.
💡Tip: If you’re boosting from the Instagram iOS app, Meta charges an Apple service fee of 30% on top of your ad spend. To avoid that, use the boost from instagram.com in your browser instead.
7. Hit “Boost” and wait for approval
Once you’re all done, tap the “Boost Post” button, and then sit back while Instagram works its magic.
Note that it can take up to 24 hours for Instagram to review your boosted post, so if it’s time-sensitive (like a product launch), submit it for review as early as possible. You can always pause the ad until you’re ready to start spending your budget.
The Real Price Tag on a Boosted Post

Boosting an Instagram post is one of the most cost-effective ways to reach a wider audience, increase engagement, and drive qualified traffic to your site.
The amount you pay depends on your campaign objective, audience size, competition in your niche, and time of year (holiday seasons get pricey). As a general benchmark, most small businesses see cost-per-click (CPC) in the $0.50 to $1.00 range and cost-per-thousand-impressions (CPM) between $2 to $6, though your mileage will vary.
Here’s how to think about budget tiers in practice.
- $1 to $5/day: You’re testing the waters. This is a good option if you want to see whether a post resonates with a new audience, but don’t expect massive reach.
- $5 to $15/day: You’re in the sweet spot for most creators and small businesses, with enough budget for Instagram’s algorithm to optimize delivery and show your content to a meaningful number of people.
- $15+/day: You’re making a real push. This is ideal for product launches, flash sales, or time-sensitive campaigns that require volume quickly.
The great thing about a boosted post is that you decide how much it costs. Just bear in mind that the smaller the budget, the fewer people you’ll reach. It can pay dividends to stretch your advertising budget where possible, especially if your targeting options are niche.
5 ways to make the most out of every boost
- Boost posts that already have social proof. A post with 50 comments and a bunch of saves signals to new viewers that it’s worth paying attention to.
- Match your CTA to your goal. If you picked “More messages” as your goal, don’t send people to your website; send them to your DMs. Mismatched CTAs confuse the algorithm and your audience.
- Keep your audience tight, not broad. It’s tempting to cast a wide net, but a smaller, well-defined audience almost always outperforms a massive one. You’d rather reach 5,000 people who actually care and interact with your content than 50,000 who scroll right past.
- Run boosts for three to six days. One-day boosts don’t give Instagram’s algorithm enough time to figure out who to show your content to. Three to six days is the sweet spot for optimization without overspending.
- Pair your boost with automation. A boosted post drives traffic and attention, but what happens when those new followers DM you, comment on your post, or reply to your story? If you’re not responding quickly, you’re leaving money (and potential new followers) on the table.
Don’t worry — you don’t have to be glued to your phone all night to make sure you respond to everyone. Instead, you can set up a few automations to reply to DMs, comments, and Story replies, and you’ll be in a good spot. Of course, our suggestion is to use Manychat to do this — it’ll only take a few clicks, and you can get started for free.
Why You Can’t Boost Certain Posts (And How to Fix It)

You found the perfect post, tapped “Boost,” and… nothing happened. Or worse, you got an error. Here are the most common reasons a post can’t be boosted, and what to do about each one.
- You’re on a personal account. Boosting is only available for Professional (Creator or Business) accounts. The fix is simple — go to Settings > Account type and tools > Switch to professional account. It takes about 30 seconds.
- Your content violates Meta’s ad policies. Instagram reviews every boosted post against its advertising standards. If your post includes restricted content (like certain health claims, misleading language, or anything in the “before and after” category), it’ll get rejected. Review the policies and either edit the post or pick a different one.
- The post uses copyrighted music. This is the big one for reels. If your reel includes a licensed song from Instagram’s music library, it might not be eligible for boosting. Swap the audio for an original sound, a trending song, or a royalty-free track and try again.
- Your post doesn’t meet format requirements. Most feed posts, reels, carousels, and stories are eligible, but there are edge cases. For example, reels with certain interactive stickers or effects may not qualify.
Your Boost Ran. Now What?

When your boost finishes running, don’t just shrug and move on. The data it generated is genuinely useful, so you should take advantage of that.
Head to your profile, tap Ad Tools, then Past Ads to pull up your results. You’ll see metrics for each boosted post, but the ones that matter most depend on the goal you picked.
If you chose “More website visits,” focus on clicks and cost-per-click. Went with “More profile visits”? Look at profile visits and follower growth during the boost period. And for “More messages,” check how many conversations started.
As a rough benchmark: If your cost per click is under $1 and your engagement rate on the boosted post is higher than your organic average, the boost did its job. If the numbers are underwhelming, that’s still useful info — it tells you the post (or the audience targeting) needs work before you spend more.
Frequently asked questions
Yes. You can boost any eligible post on your profile regardless of when you published it. There’s no expiration date. If an old post is still relevant and performing well, go for it.
No, you need a Professional (Creator or Business) account to boost posts. You can switch your account type in Settings > Account type and tools. It’s free and takes less than a minute.
The most common reasons are using a personal account, violating Meta’s ad policies, or including copyrighted music in a reel. Check the eligibility checklist above for the full rundown and fixes.
Yes, Instagram lets you boost reels in addition to image posts, carousels, and stories. Just make sure the reel doesn’t use any copyrighted audio and that it meets Meta’s ad policies.
Most creators and small businesses see the best results running a boost for three to six days — long enough for Instagram’s algorithm to optimize delivery but short enough to keep your budget tight. One-day boosts rarely give the algorithm enough data to work with.


Originally published: Jan 5, 2022, Updated: Jun 1, 2026