Instagram Ads Manager is a Myth (but Here’s How to Run Ads Anyway)

90% of Instagram users follow at least one business, which is why most creators and brands run ads on the platform. If you want to join them, the best way to do so is to use Meta Ads Manager — the same tool you’d use for Facebook ads, but pointed at a different platform (IG).
Whether you’re running your first Instagram campaign or you’ve boosted a few posts and want to graduate to the real deal, this guide is for you. We’re covering everything you need to know to get an Instagram campaign up and running, from setting up your account in Meta Ads Manager to interpreting your performance results and optimizing for conversions.
TL;DR
- You can boost posts from the Instagram app, but full campaigns with custom audiences and advanced targeting require Meta Ads Manager.
- Once you’re in Meta Ads Manager, it takes about eight steps from account connection to live campaign.
- Pairing ads with automated DMs can help turn ad clicks into actual sales.
Note: Instagram Ads Manager Isn’t Actually a Thing

Let’s clear this up once and for all: Instagram is owned by Meta, so all Instagram advertising runs through Meta Ads Manager. You might see people call it “Instagram Ads Manager” or even “Facebook Ads Manager” (the old name), but they’re all the same tool.
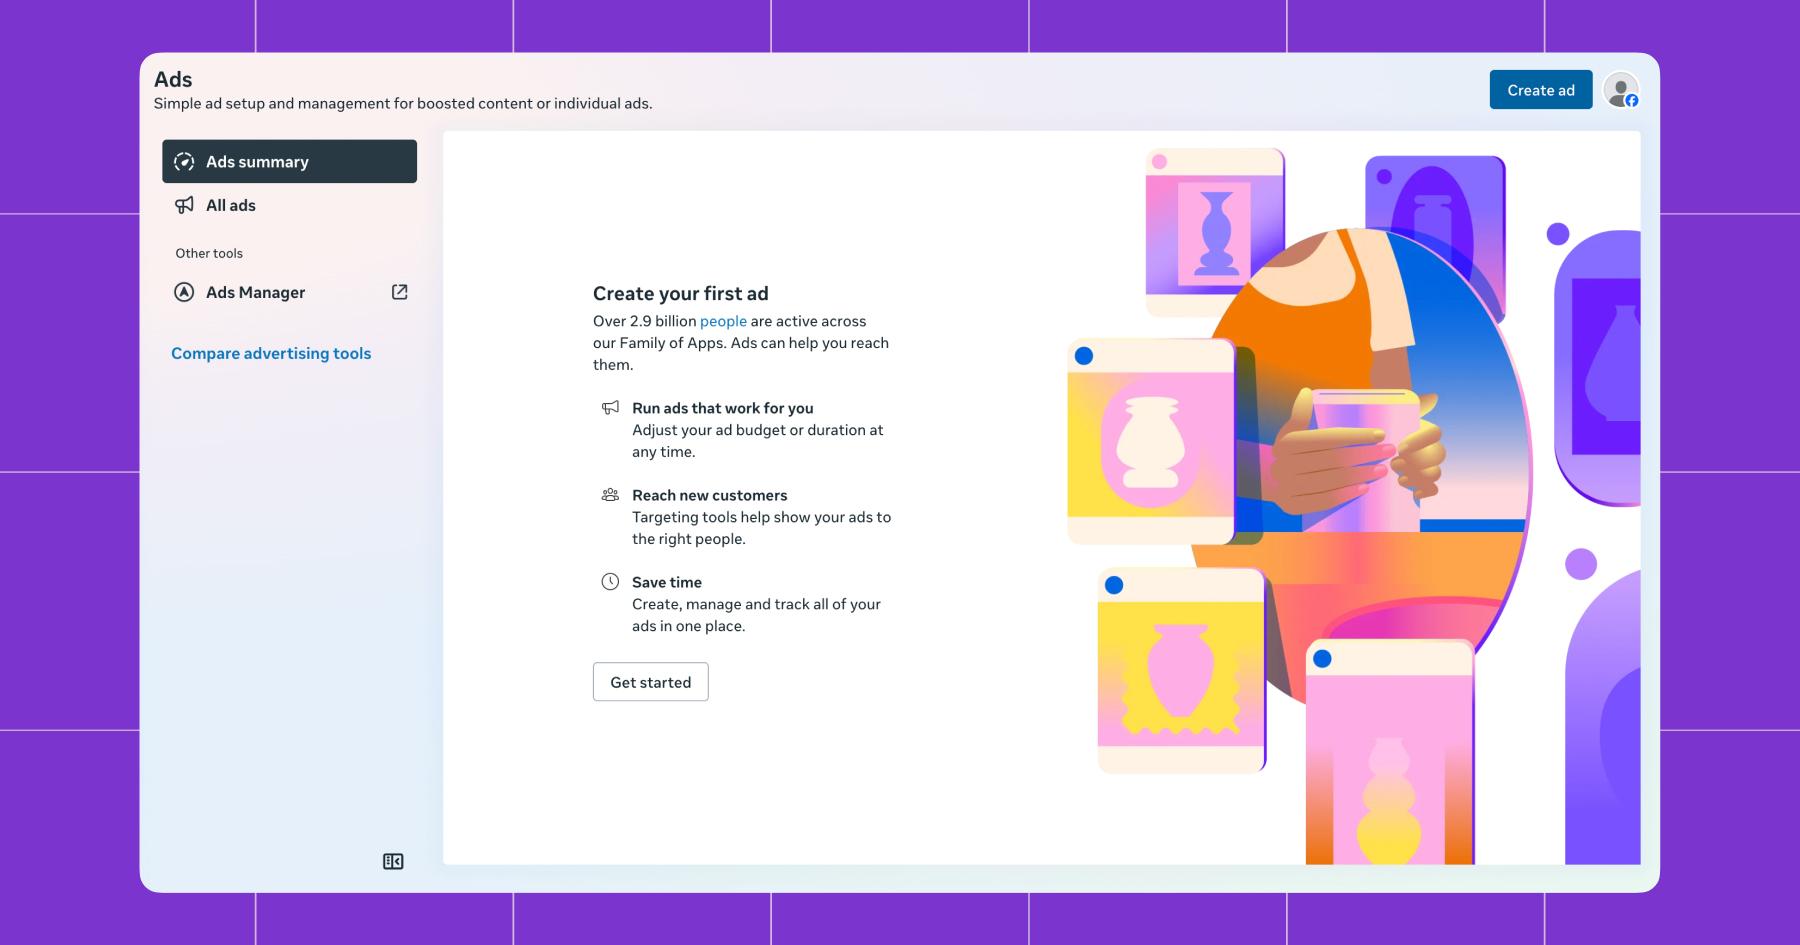
To access it, just open Meta Business Suite and sign in. From there, navigate to Ads Manager in the left-hand menu. You’ll need a Professional or Business Instagram account connected to a Meta Business Portfolio (formerly called Business Manager) to get started.
If you want to promote an existing post quickly, you can do that directly from the Instagram app (more on that in a bit). But for full campaigns with custom objectives, detailed targeting, and multiple ad formats, Meta Ads Manager is where the magic happens.
Should you run ads on Instagram? (yes)
On average, people spend just over 30 minutes per day on Instagram, and it’s not all mindless scrolling (although, sure, some of it is). A good chunk of that time goes toward discovering new creators and brands, exploring products, and even making purchases.
Instagram reports that 70% of shoppers turn to the platform to discover new products. Features like Instagram Shopping let brands integrate their product catalog directly into their profile, so users can find and buy their products without ever leaving the app. And with Story and reels ads now in the mix, your ads have the potential to reach people where they’re spending most of their time.
Finally, Meta’s ad revenue (which includes Instagram ad revenue) hit nearly $200 billion last year — a clear sign that businesses are seeing returns worth reinvesting in.
Hitting “Boost” vs. Running a Full Campaign

Should you just hit boost in the Instagram app or spend time crafting a full campaign? It’s an important question, and the answer depends on what you’re trying to do.
Boosting a post takes about 30 seconds. You pick an existing post, choose a basic goal (like more profile visits or website clicks), set a budget, and you’re done. It’s great for giving a well-performing post a little extra reach. But the targeting options are limited, you can’t A/B test creative, and you won’t get the detailed reporting that comes with a full campaign.
Running a campaign through Meta Ads Manager gives you the full toolkit. You can set campaign objectives and create custom and lookalike audiences. You can also run manual ad placements, test multiple creative formats, and dig into granular performance data. It takes more time to set up, but if you want more control (and to see the results of your spend), it’s worth it.
Boost in the Instagram app vs. running a campaign in Meta Ads Manager | ||
|---|---|---|
Feature | Boost from the Instagram app | Full campaign in Meta Ads Manager |
Setup time | Under a minute | 15 to 30 minutes |
Campaign objectives | Limited (visits, messages, engagement) | Six options: awareness, traffic, engagement, leads, app promotion, sales |
Audience targeting | Basic demographics and interests | Custom audiences, lookalikes, Advantage+ Audience |
Ad placements | Auto-selected | Manual control over Feed, Stories, reels, Explore, and more |
Creative options | Existing post only | New creative, carousels, video, collections |
Performance reporting | Basic metrics | Full breakdown by placement, audience, and conversion |
How to Create an Instagram Ad Campaign in 8 Steps

Think of this as your Instagram Ads Manager tutorial — every step from connecting your account to going live. None of it’s complicated, but getting each step right means your budget actually works for you instead of disappearing into the void.
1. Connect your Instagram account to Meta Business Suite
Before you can run ads, you need to link your Instagram account to Meta Business Suite.
To do this:
- Sign in to Meta Business Suite.
- Go to Settings → Accounts → Instagram Accounts.
- Click the blue “Add” button and select the Instagram account you want to advertise from.
- Enter your login information and confirm the connection.
2. Pick a campaign objective that matches your goal
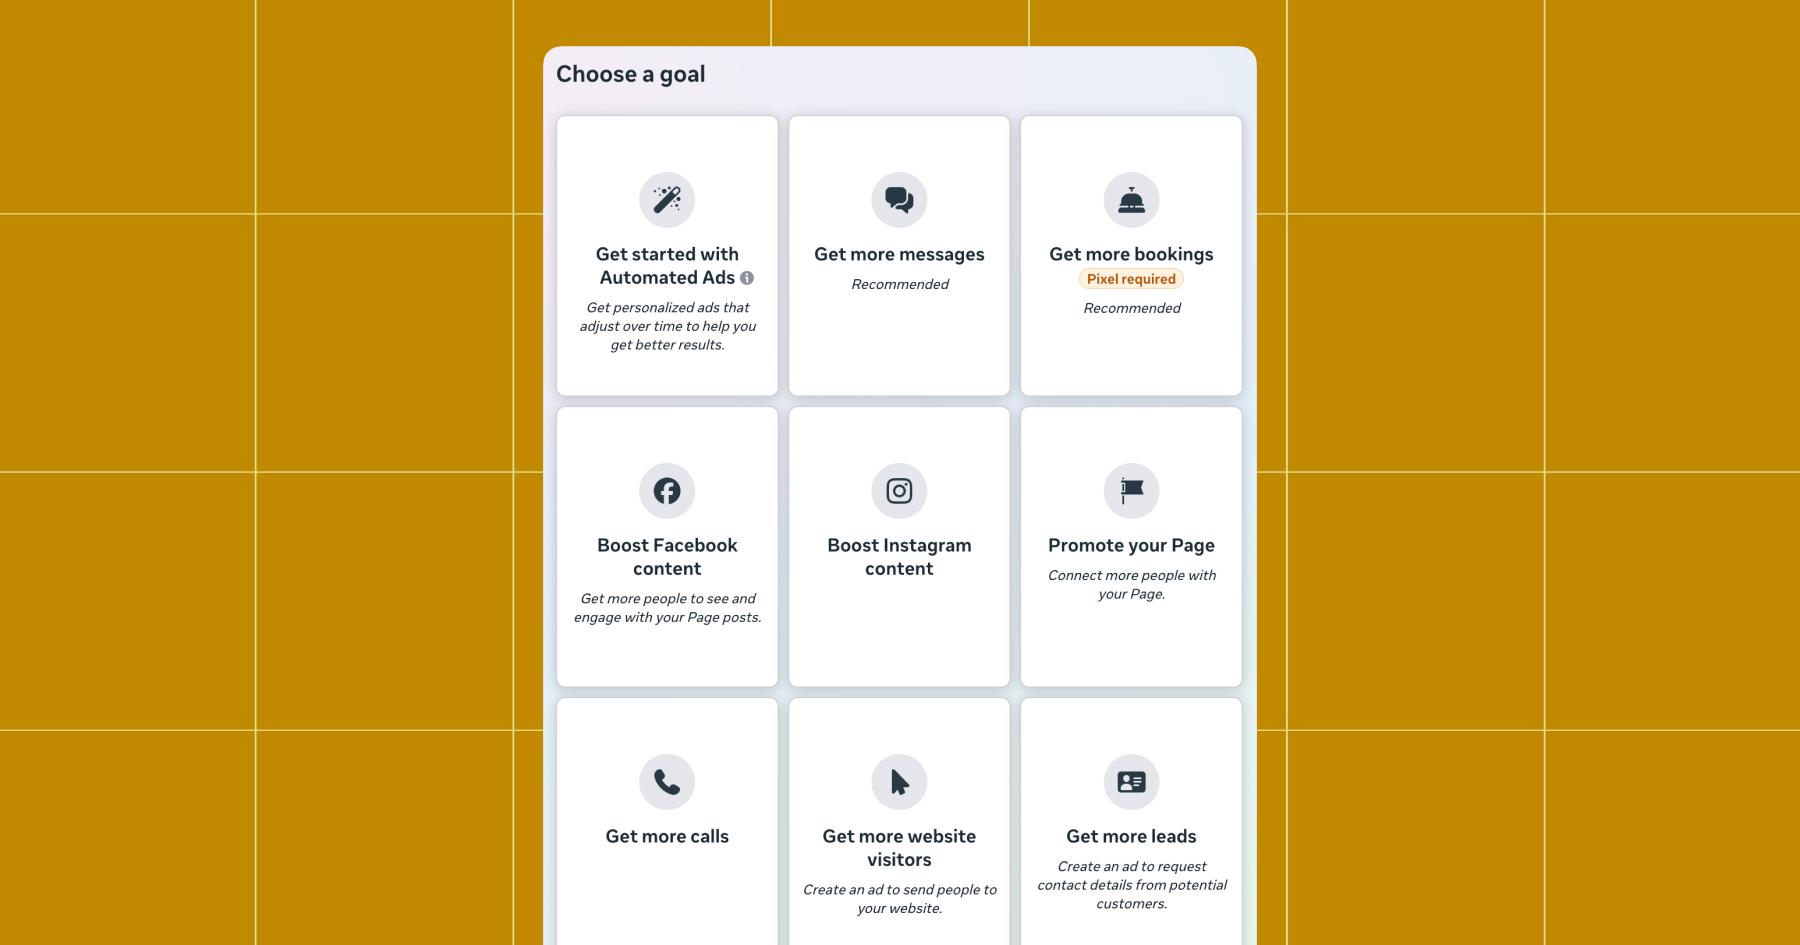
Once your account is connected, open Ads Manager and hit “Create.” This is where you define what your campaign is actually trying to accomplish. If you’ve never created an ad campaign before, you might see some suggestions from Meta tailored to different goals.
You can choose from any of these and start creating a simple campaign in just a few clicks.
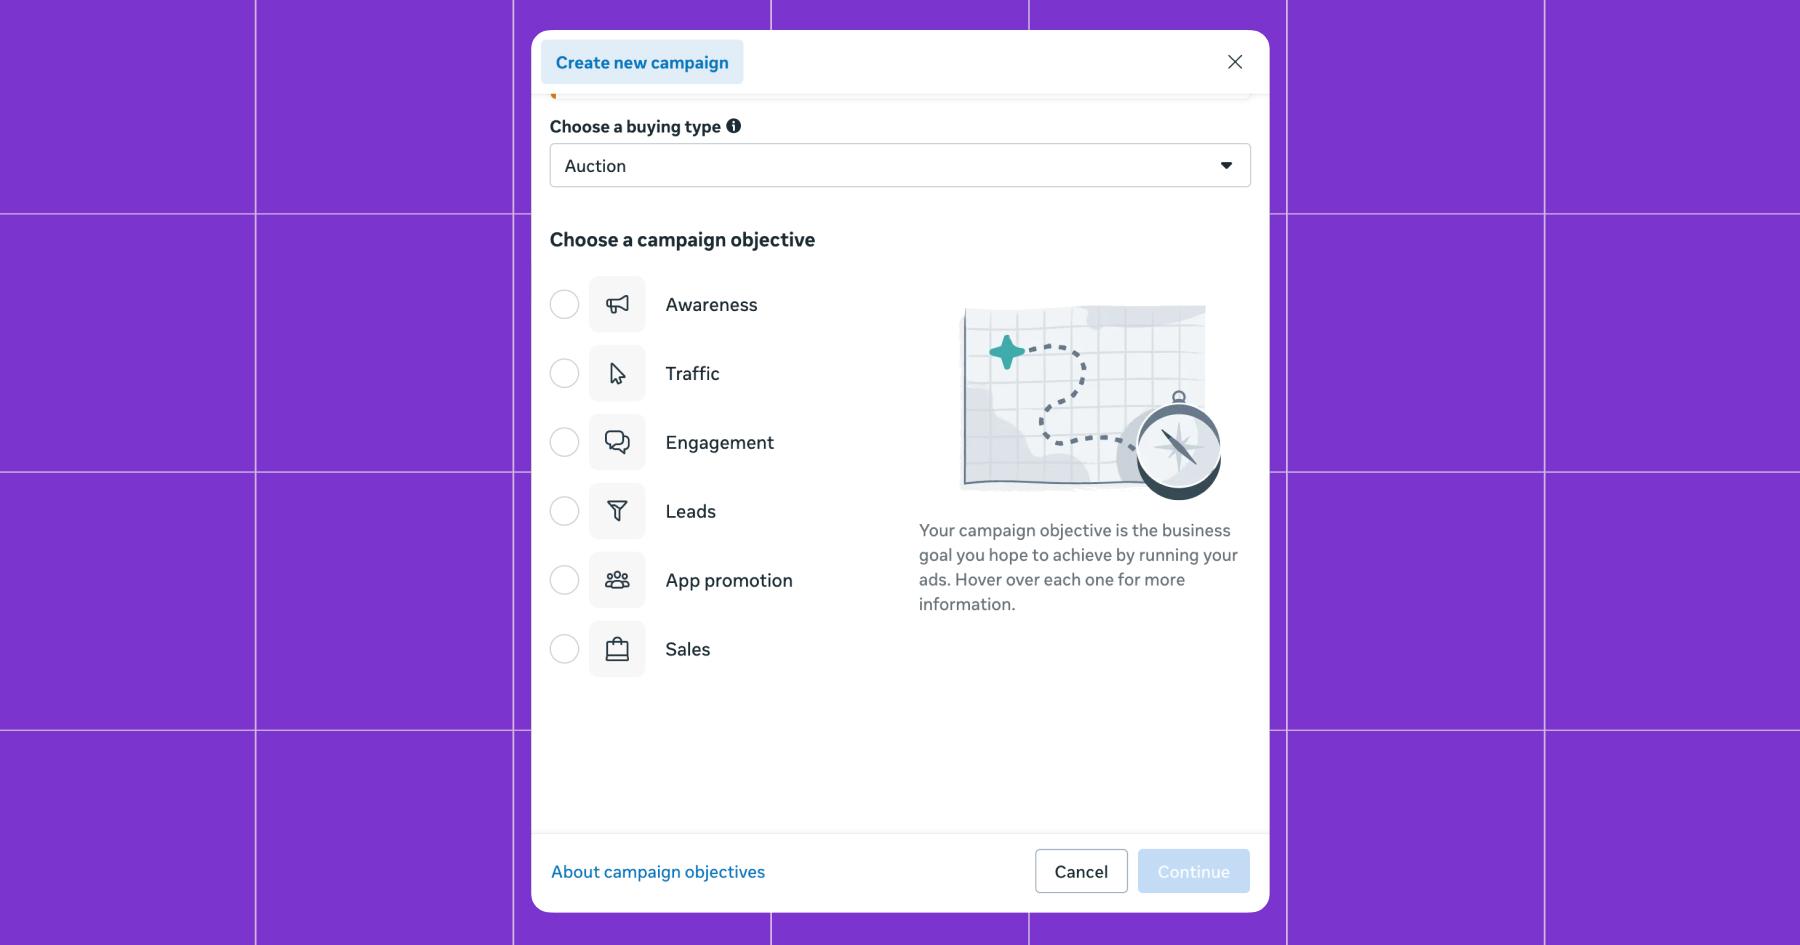
If you’ve already run some ads before, you’ll likely see the campaign objective screen.
Meta currently offers six campaign objectives:
- Awareness: Get your brand in front of as many relevant people as possible
- Traffic: Send people to your website, app, or a specific landing page
- Engagement: Drive likes, comments, shares, saves, or message conversations
- Leads: Collect contact info through instant forms or Messenger
- App promotion: Get more app installs or re-engage existing users
- Sales: Optimize for purchases, whether on your website or through a catalog
Choosing an objective tells Meta’s algorithm what kind of user to show your ad to. Pick “Sales” and the algorithm finds people who actually buy things. Pick “Awareness,” and it optimizes for views instead of conversions.
If you have a website, you can also set up Meta Pixel, a code snippet you can add to your website to track user behavior and measure ad effectiveness. In some cases, this may be required before sending a campaign live.
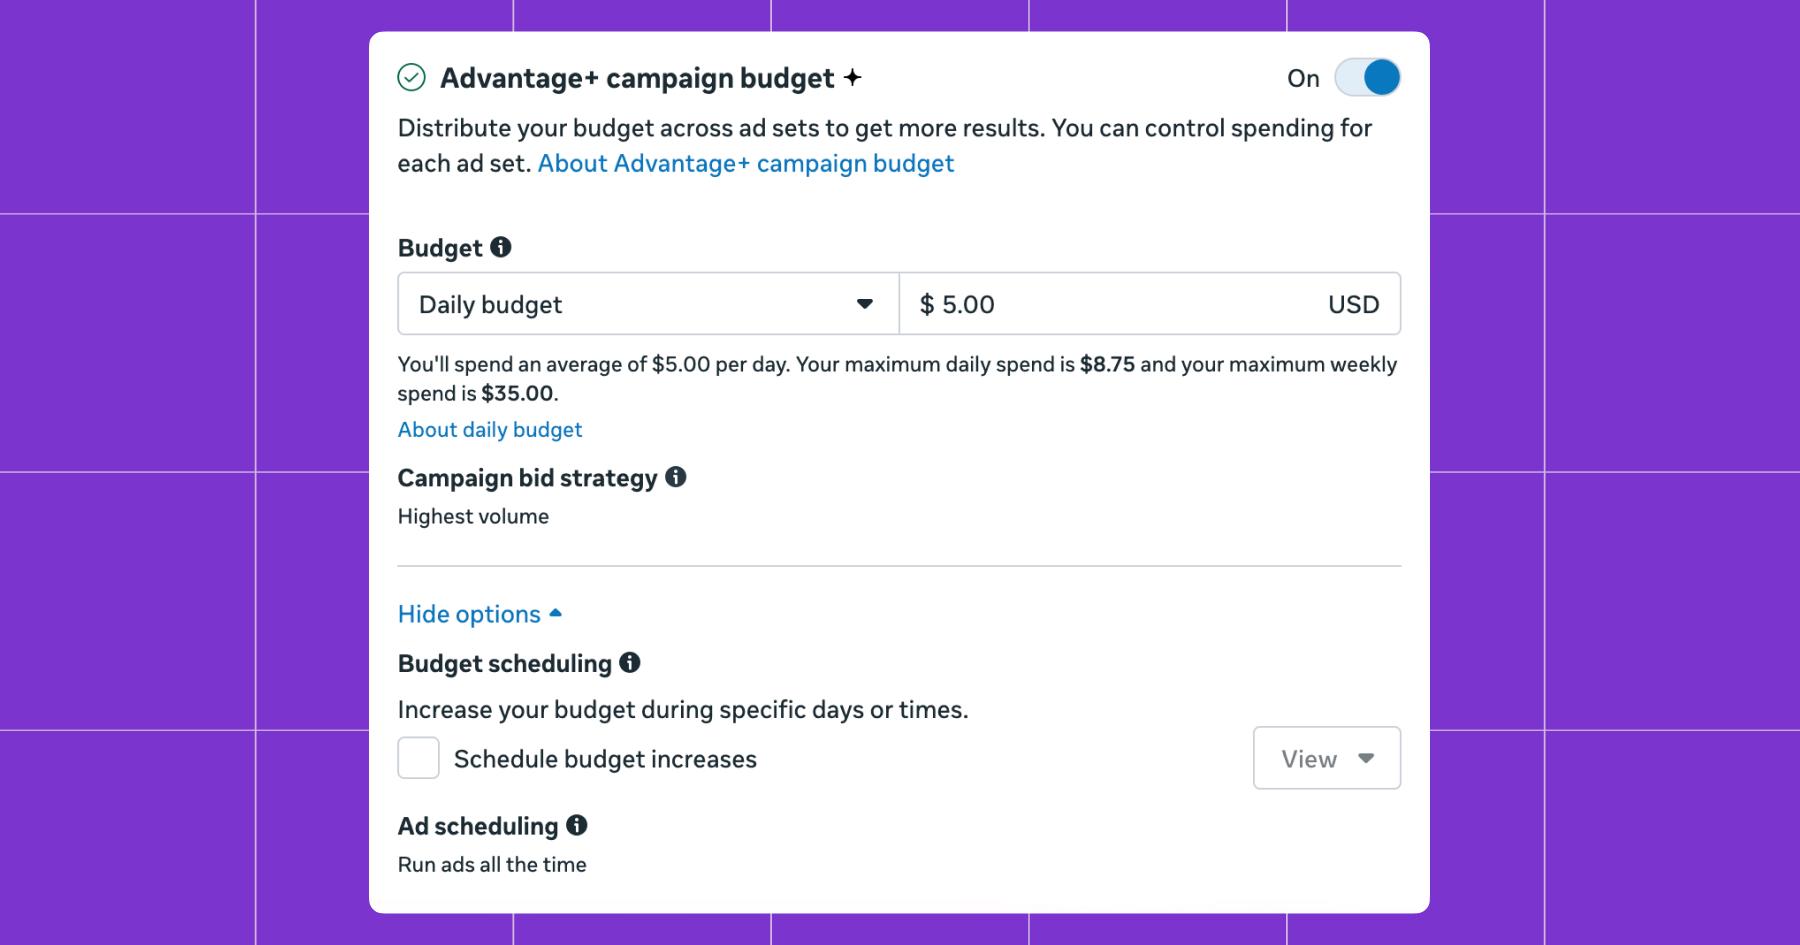
3. Set your budget and schedule
Once you choose an objective, you’ll see a screen where you can name your ad campaign and set a budget.
As of 2026, there are two options for ad spend:
- Auction, a cost-effective option that lets you buy placements in real time
- Reservation, an option that allows you to buy in advance (helping predict total spend).
You’ll also see Advantage+ campaign budget toggled off by default. Advantage+ lets Meta distribute your budget across ad sets automatically based on performance. According to Social Media Examiner, Advantage+ Shopping campaigns decreased cost per purchase by 12% in Meta’s own testing, so it’s generally worth toggling on unless you have a specific reason to control spend per ad set manually.

When scheduling Instagram campaigns, it’s less about picking a random date range and more about aligning your timing with your audience’s behavior and your campaign goal. Start by choosing a duration that gives the algorithm enough time to optimize — typically at least five to seven days for smaller campaigns, or a few weeks for larger ones — while avoiding frequent resets that can hurt performance.
If you check Instagram Insights, you can identify when your audience is most active, then schedule ads to run during those peak engagement windows, or run them continuously if you want steady delivery. If you’re promoting a time-sensitive offer, build in a ramp-up period and increase budget closer to key dates. In general, avoid turning ads on and off too often; instead, let them run consistently and make gradual adjustments based on performance data.
4. Define your target audience
One of the biggest advantages of advertising on Instagram via Meta Ads Manager is the control you have over who sees your ads. But Meta has been shifting toward AI-driven targeting, so the experience looks a little different from how it used to.
On that note, one of the best options for targeting is to use the Advantage+ Audience, which lets the algorithm find the best people to show your ad to based on your pixel data, past conversions, and ad content. You’ll still need to tailor this audience, though; choose an age range and location, and add some demographics, interests, or job titles that represent your ideal customer(s).
You can also create custom audiences using your Meta Pixel data (people who’ve visited your site) or upload a customer list for retargeting. Lookalike audiences let the algorithm find new people with qualities similar to those of your best existing customers.
5. Choose your Instagram ad placements
This step is crucial if you only want your ads on Instagram. If you’re okay with your ads showing up on Instagram, Facebook, and possibly even WhatsApp, you can choose Advantage+ Placements. This will distribute your ad across the entire Meta network, using your spend as efficiently as possible.
If you want to run an Instagram-only campaign, select Manual Placements and check only Instagram. Scroll down to the placements section, and you should see a list of platforms where your ad is currently set to appear.
To limit your ad to Instagram only, simply uncheck the box next to “Facebook” and any other platforms you don’t want your ad to appear on. Once you’ve made your changes, save your ad set, and your ad should only appear on Instagram going forward.
From there, you can get even more specific with where your ads show up:
- Stories
- Feed
- Reels
- Explore
- Explore home
- Search results
- Profile feed
Each placement has different creative requirements and reaches people in different mindsets. Reels, for example, are where people go for entertainment, so scroll-stopping videos tend to perform best there. Feed ads blend into the browsing experience, and Stories feel more casual and ephemeral.
6. Upload your creative and write your copy
Now comes the fun part — designing the actual ad.
At this point, you’ll set the Instagram account to advertise from (double-check you’ve selected the right one under the Identity section), write your ad copy with a headline and description that encourages action, choose your ad format (single image, video, carousel, or collection), and enter the landing page URL where you want to send people.
You can also use one of your Instagram posts as the ad; just make sure it aligns with the campaign goal you set.

Always enable previews so you can see exactly how your ad looks in each placement before it goes live. What looks great in the feed might get cropped awkwardly in Stories, so check every format you’ve selected.
7. Review and publish
Before you hit that green “Publish” button, review everything. Make sure your targeting isn’t too broad (or too narrow) and your creative looks good across all selected placements. If you’re driving people to a website, make sure the URL actually works.
Once you publish, the campaign gets sent to Meta’s ad review team. Most ads are approved within 24 hours, though some may take longer if they require manual review.
Common reasons for rejection include too much text on images, references to prohibited content, or misleading claims — so avoid those.
Which Ad Format Should You Actually Use?

Knowing which format to use can make or break your campaign. Here’s what’s available and when to use each one.
- Image ads are the simplest — a single photo with ad copy. They work well for product shots, announcements, or anything visually striking that doesn’t need motion to tell the story.
- Video ads let you show your product in action, tell a story, or demonstrate a how-to in up to 60 seconds (or longer in some placements). They tend to get higher engagement than static images, especially in Reels and Stories.
- Carousel ads let people swipe through up to ten images or videos in a single ad. Perfect for showcasing multiple products, walking through features, or telling a sequential story.
- Stories ads appear between organic Stories and feel native to the experience. Since 85% of users view content with sound off, captions and text overlays are essential here.
- Reels ads show up between organic reels and are optimized for the short-form video experience. If your creative feels like content (not an ad), it will perform significantly better here — the same goes for Stories ads.
- Collection ads combine a cover image or video with a product catalog underneath, letting people browse and buy without leaving Instagram. They’re great for e-commerce brands with multiple SKUs.
- Explore ads reach people in discovery mode — they’re actively looking for new content and accounts to follow, which makes them receptive to new brands.
Instagram ad format specs | ||
|---|---|---|
Format | Recommended specs | Best use case |
Image | 1080 x 1080 px (1:1) or 1080 x 1350 px (4:5) | Product shots, announcements |
Video | 1080 x 1920 px (9:16) for Stories/Reels, up to 60 sec | Demos, tutorials, storytelling |
Carousel | Up to 10 cards, 1080 x 1080 px each | Multiple products, step-by-step |
Stories | 1080 x 1920 px (9:16), up to 15 sec per card | Time-sensitive offers, launches |
Reels | 1080 x 1920 px (9:16), up to 90 sec | Entertainment-first content, brand awareness |
Collection | Cover image/video + product catalog | e-commerce browsing and purchase |
Explore | Same specs as Feed (1:1 or 4:5) | Reaching new audiences in discovery mode |
5 Mistakes That Burn Through Ad Budgets

Before you go live, consider these common pitfalls.
- Abusing the “Boost Post” button. Boosting is fine for a quick engagement bump, but if you’re trying to drive sales or collect leads, you need a full campaign with proper objectives and targeting.
- Targeting too broad an audience. “Everyone aged 18 to 65 who likes shopping” is too broad a target audience. Start narrow with custom or lookalike audiences, then expand once you have data on what’s working.
- Killing ads during the learning phase. Meta’s algorithm needs roughly 50 optimization events to figure out your ideal audience. If you pause or edit your campaign after 12 hours because the numbers look rough, you’re resetting the clock every time.
- Not testing creative variations. Running a single ad and calling it a day is a gamble. Create at least two to three variations with different images, headlines, or opening hooks so the algorithm can find what resonates.
- Sending traffic to a dead end. You spent money getting someone to click — now what? If your landing page is slow, confusing, or doesn’t match the ad’s promise, you’ve wasted that click.
Your Ads Are Live — Now What?

Resist the urge to check your ad results every 15 minutes on day one. (I know, easier said than done.) When your campaign first launches, it enters what Meta calls the learning phase — usually the first 50 optimization events. During this period, the algorithm is figuring out who to show your ad to. Performance will be inconsistent, and that’s normal. Don’t panic and don’t make changes yet.
After the learning phase stabilizes, here are the metrics worth watching in Meta Ads Manager:
- Reach tells you how many unique people saw your ad.
- Impressions count total views (including repeat views from the same person).
- Click-through rate (CTR) shows the percentage of people who saw your ad and clicked — anything above 1% is generally solid on Instagram.
- Cost per click (CPC) tells you what you’re paying for each click.
- Return on ad spend (ROAS) is the big one for e-commerce — it measures how much revenue you’re generating per dollar spent.
If an ad is underperforming after the learning phase, pause the weakest-performing set and reallocate its budget to the winners. Then test new creative (even small changes, like a different opening frame, can make a big difference), and narrow or expand your target audience based on the data.
According to Meta’s own guidance, making significant edits during the learning phase resets its trajectory and, in turn, sacrifices any momentum it was getting. So patience pays off here.
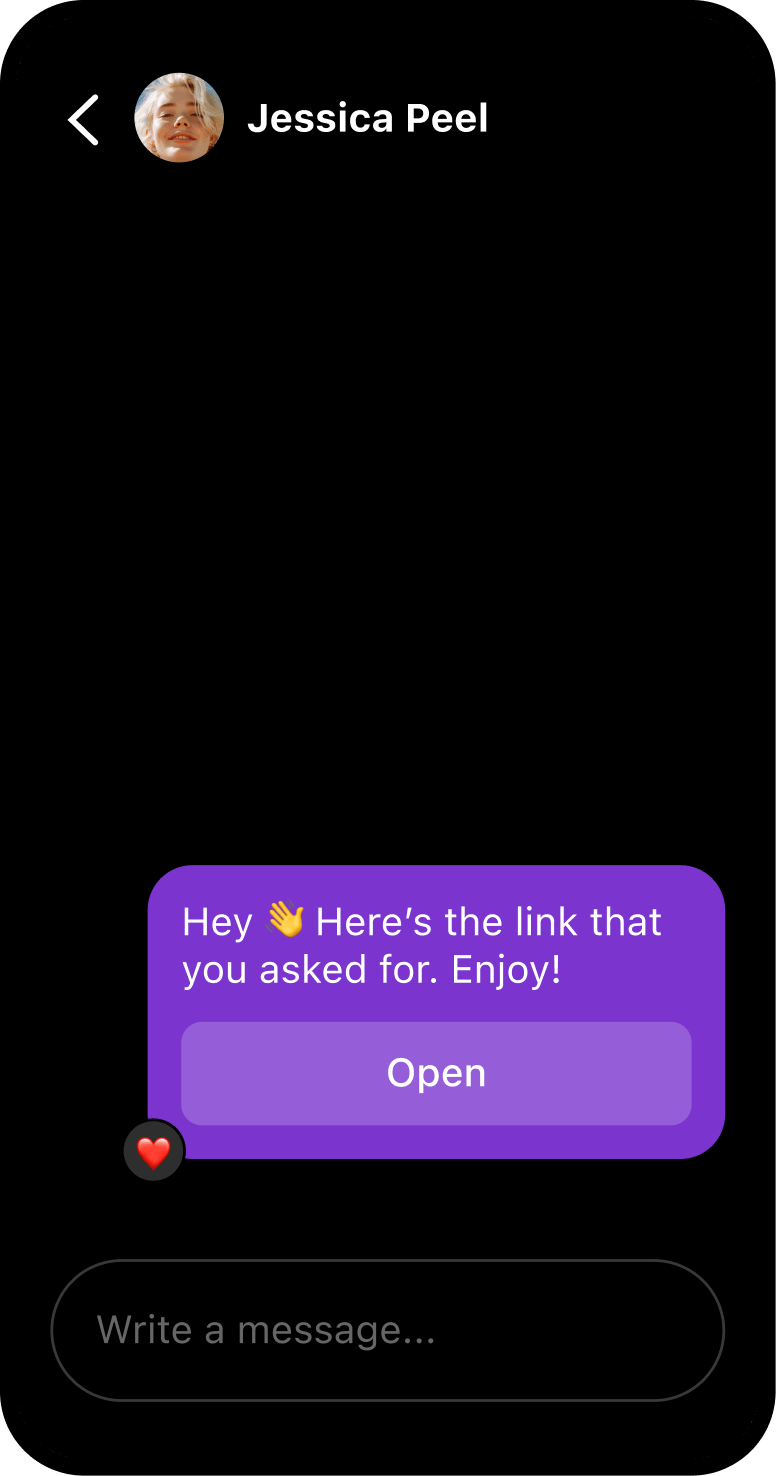
How to Turn Ad Clicks Into Conversations

Running ads is great for getting attention. But what happens when someone taps your “Send Message” CTA and lands in your DMs? If nobody’s there to respond (or if they’re waiting hours for a reply), that lead goes cold fast.
With Manychat, you can automatically respond to those inquiries in real time — no manual DM-checking required.
Example: You run a Story ad with a “Send Message” CTA. Someone taps it and lands in your DMs. Instead of silence, they are greeted with a menu of options (what we call Conversation Starters) — maybe “Shop our bestsellers,” “Get a discount code,” or “Ask a question.”
Based on their choice, Manychat guides them toward a purchase, collects their email, or answers their FAQ. It’s one of the best ways to make sure you seal the deal after someone interacts with one of your ads — no automation experience required.
You know what to do: Sign up for Manychat.
Or, keep learning.
Frequently asked questions
No, Instagram ads are created and managed inside Meta Ads Manager, the same tool used for Facebook and Messenger ads. There’s no separate Instagram-specific tool. You just select Instagram as your placement when building a campaign.
There’s no fixed price. You set your own daily or lifetime budget, and actual costs depend on your audience, objective, competition, and creative quality. Most businesses can start with as little as $5 per day, though in competitive industries, costs per click may be higher.
You need a Meta Business Portfolio to access Ads Manager, and connecting a Facebook Page is currently required to run Instagram ad campaigns — even if you only want ads on Instagram.
Boosting promotes an existing post with simplified targeting options. A full campaign in Meta Ads Manager gives you control over objectives, audiences, placements, creative formats, and optimization — plus much more detailed performance reporting.
Most ads are reviewed and approved within 24 hours. Some may take longer if they require manual review, especially if the creative includes sensitive topics or borderline content.