Connecting Your WhatsApp Automations to Facebook and Instagram Ads
Introduction
Hello there, friends! Welcome to our enlightening session on seamlessly connecting your WhatsApp automations to your Facebook and Instagram ads. If navigating the ads manager isn’t your strong suit, I highly recommend you watch the introductory and concluding lessons of our comprehensive CTX webinar with Meta, which is conveniently linked below. These lessons will provide you with a solid foundation on harnessing the ads manager’s capabilities and optimizing your ad campaigns.
Let’s dive into our first campaign and discover the magic of bridging WhatsApp automations with your ads.
Key Features Covered:
- Understanding the integration between WhatsApp automations and Facebook/Instagram ads.
- Utilizing the ads manager to create campaigns for driving traffic to WhatsApp.
- Crafting messaging templates within Manychat for seamless connections.
- Employing keywords to trigger automations based on user interactions.
Step-by-Step Guide:
Creating a WhatsApp-Integrated Ad Campaign
- Accessing the Ads Manager: Open the ads manager and select “Create” to initiate your ad campaign.
- Choosing the Objective: Scroll through the new simplified objectives and pick “Engagement.”
- Setting Up the Campaign: Name your campaign with a clear goal, like “Leads for New Product.”
- Configuring the Ad Set: Name your ad set based on the target audience, and set the objective to “Messaging apps.”
- Optimizing for Messaging: Customize your ad set to drive leads to WhatsApp, turning off options for other platforms.
- Creating the Ad: Craft your ad’s creative elements, focusing on WhatsApp integration.
- Personalizing the Ad: Name the ad and add a creative setup. You can use fun characters like “Leopold Ferdinand” for illustration.
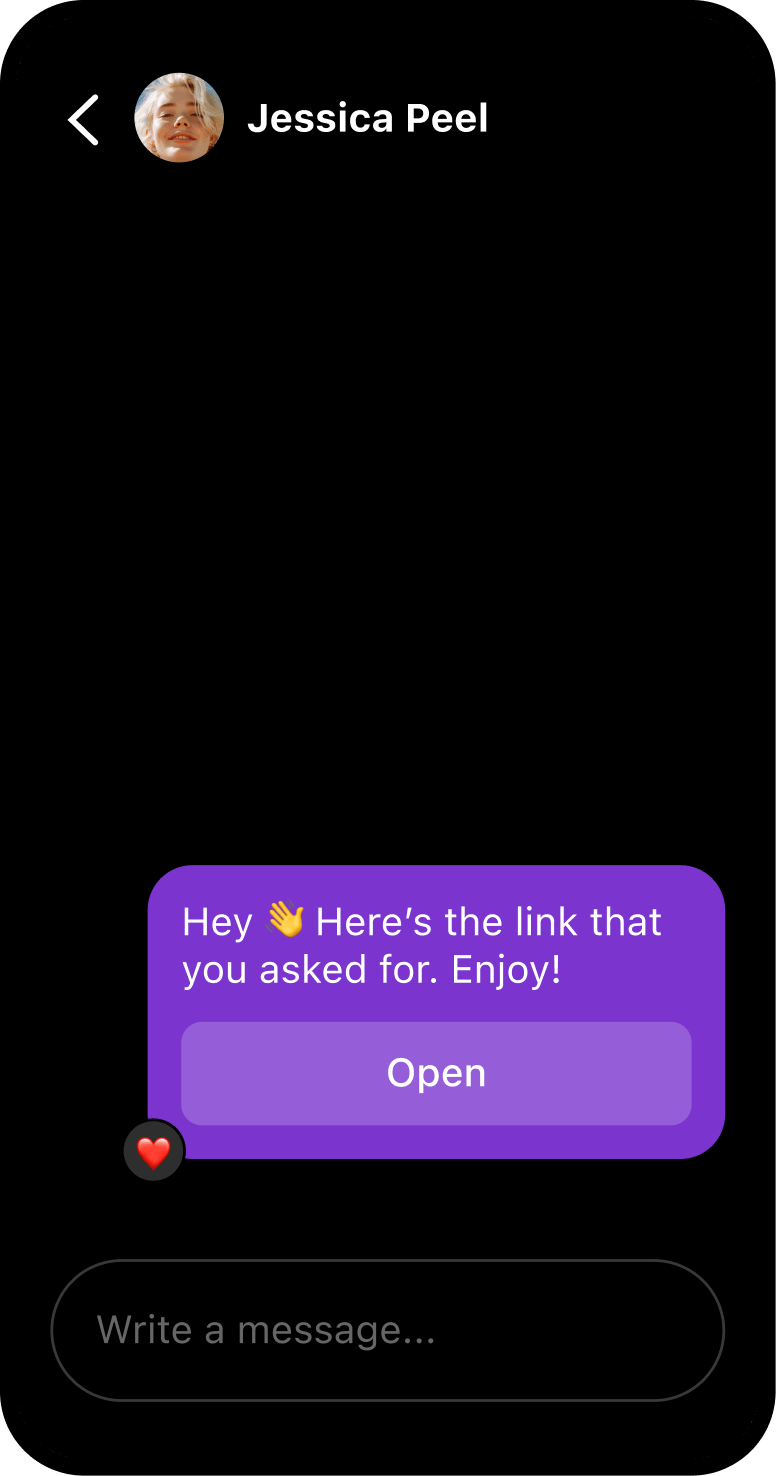
- Call to Action and Messaging Templates: Ensure your call to action is “Send WhatsApp message,” and access the messaging templates.
- Editing Messaging Templates: Click “Edit” on the messaging templates section to customize the initial interaction.
- Configuring the Welcome Message: Customize the welcome message to engage users and offer options.
- Adding FAQ Options: Utilize predefined questions like “Pickup, Stock, and Upcoming Events,” or customize them.
- Naming the Messaging Template: Name the template for easy reference and storage.
Triggering Automations in Manychat
- Implementing Responses: Identify the questions in your FAQ and preplan your responses.
- Creating a New Flow: Start a new flow in Manychat to trigger automations based on user interactions.
- Setting up Responses: Set up responses based on keywords. For instance, match user queries with keywords.
- Mapping Responses: Copy-paste FAQ responses into the flow, setting triggers for each response.
- Associating with Keywords: Set up keyword-based triggers to match user inquiries.
- Testing and Deploying: Test the response and triggers, set the flow live, and confirm successful integration.
Conclusion
You’re now equipped with the know-how to seamlessly integrate your WhatsApp automations with your Facebook and Instagram ads. By following these simple steps, you’ll be able to create engaging ad campaigns that lead users directly to your WhatsApp interactions, boosting your engagement and interaction rates. This strategy not only optimizes user experience but also enhances the efficiency of your marketing efforts. In our final lesson, we’ll explore business and WhatsApp verification, helping you decide whether it’s a timely step for your journey. See you there!
Meta CTX Webinars